Nature’s Multivitamin: The Ultimate Guide to Sprouting
Tess
Pennington
Ready Nutrition
While many of us are awakening to the dangers (ahem chemicals) that are in our food sources, not enough awareness is being made about some of the dangers that lie in over-the-counter vitamins. That’s right, some of your vitamins could be doing more harm than good.
Finding the right supplements can be a tricky endeavor. But, what if I told you it’s really not? In fact, you could easily grow your own vitamins naturally from the convenience of your kitchen window. What am I talking about? I’m talking about sprouts.
Sprouts are Power Packed
Sprouts are nature’s multivitamin and provide the highest amount of vitamins, minerals, proteins, and enzymes of any of food per unit of calorie. They are commonly referred to as a complete food because they are packed with high levels of complete proteins, vitamins, minerals, enzymes and extraordinary amounts of protein.
How Do Spouts Benefit the Body?
- Assists in healing the body
- Cleanse the body
- Prevents diseases
- Enhances the general functioning of bodily organs
- Aids in digestion
- Removes gas from the stomach
Some of our favorites are:
How To Get Started
You’re going to love this – almost anything can be made into a sprout (except for nightshade varieties like tomatoes and eggplants). The most common types of seeds to sprout include alfalfa, grains, peas, lentils, radish, broccoli, cabbage, mustard seed, garbanzos, quinoa, nuts, and red clover. Sprouts can be grown every week for continuous staggered batches. In fact, there are sprout kits available to help you expand your sprouting palate.
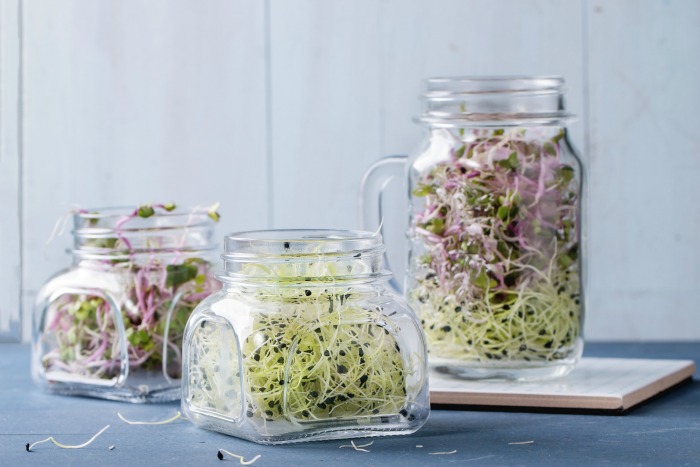
1. First, you need something to let your seeds sprout in. If you have a large mason jar, that would work. We like adding a sprouting lid like this one to the top of our Mason Jar Sprouts to help with easy rinsing. If you plan on sprouting different varieties of sprouts, you may want to invest in a low-cost 4 tray sprouting kit like this one. For large seeds, like beans and legumes, consider adding them to a large wide-mouth jar. When beans begin to sprout, they will quickly take up a lot of room. For smaller seeds, using a quart-sized jar or the sprouting tray would work well.
2. Next, you need to right kind of seeds. For optimum nutrition, I prefer to purchase sprouting seeds that are non-GMO and organic varieties.
3. Now that you have your vessel and seeds picked out, it’s time to start sprouting. Simply add a tablespoon or two of seeds in a jar and fill it about ¾ full with cool water. Swish the seeds around and allow the water to drain from the jar or sprouting tray. Once the water has drained, cover with a mesh lid or cloth, secured with a rubber band, to allow air flow. Sprouting Tip: For larger beans like garbanzo or mung beans, allow them to soak overnight and then drain the water in the morning. Repeat the rinsing step twice a day for 3-4 days.
4. Set sprouts in an area in the kitchen where it receives indirect sunlight. Ideally, sprouts prefer a temperature of about 65-80ºF. If the temperature is warmer with increased humidity, rinse sprouts more frequently.
5. When sprouts are ready and have grown to the desired size, do a final rinse and drain them completely. They can be eaten immediately or transferred to a glass or plastic container and stored in the refrigerator for a few days. As a precaution, make sure the sprouts have drained completely before storing.
Sprout Safety
One of the biggest drawbacks to sprouting is their very short shelf life. Unlike other fresh produce, seeds and beans need warm and humid conditions to sprout and grow. These conditions are also ideal for the growth of bacteria, including Salmonella, Listeria, and E. coli. Not to cause concern, but since 1996, there have been at least 30 reported outbreaks of foodborne illness associated with different types of raw and lightly cooked sprouts. Most of these outbreaks were caused by Salmonella and E. coli and occurred at growing facilities. The bacterias are usually present in or on the seed, and the bacteria can grow to high levels during sprouting, even under sanitary conditions at home.
To prevent this health issue, you can follow these safety steps:
- Wash all sprouts thoroughly with filtered water before eating them.
- If you’ve purchased sprouts at the grocery store, look for the International Sprout Growers Association seal on the package or if you are buying bulk, ask your grocer if the sprouts are ISGA-approved.
- If the sprouts are pre-packaged, only purchase if the sell-by date is current or even a few days ahead.
- Examine the sprouts to make sure the roots are clean. If the stem color is not white or creamy, do not purchase them. Do not purchase sprouts if the buds are no longer attached if they are dark in color or have a musty smell.
- Smell the sprouts to be sure that they have a clean, fresh odor.
- Keep the sprouts refrigerated.
- After 2 days, compost them rather than consuming them yourself.
- If you’re buying in bulk, ask your grocer about the sell-by date.
- If you are sprouting seeds at home, follow the same guidelines described above. Learn about the source of your seeds, their ISGA-certification, and either have your grocer confirm high-quality standards for seed production or obtain contact information for the seed source and contact that company yourself.
- Follow the above guidelines regardless of the type of seeds you are sprouting, i.e., apply the guidelines to mung, alfalfa, radish, broccoli, lentil, sunflower and all other types of sprouts.
Since the shelf life is around 2 days before the sprouts begin to break down, take advantage of having them and add them to salads, sandwiches, soups, and even bread for added nutrition.
It’s that easy, folks! Sprouts are what Mother Nature intended for us in terms of additional nutrition. They are low cost, easy to grow and can give you ample dietary nutrition on a daily basis.